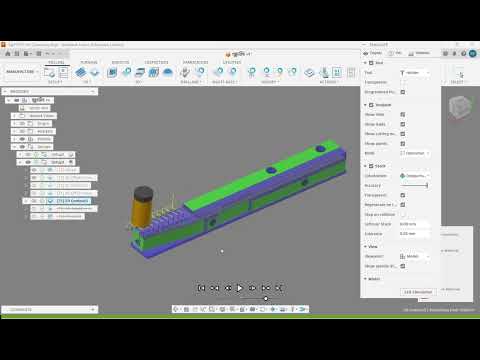
In the world of modern manufacturing, producing clean, accurate, and efficient parts relies heavily on digital preparation. Autodesk Fusion has become an industry-standard tool for computer-aided manufacturing (CAM), offering intuitive tools for machinists of all skill levels. Whether you are a hobbyist maker or a professional programmer, learning how to set up, optimize, and simulate your toolpaths in Fusion is essential for successful CNC precision machining.
Step 1: Defining Your Stock and Work Coordinate System (WCS)
Before generating cutting paths, you must accurately model the physical environment inside Fusion's Manufacturing workspace. Start by creating a new Setup.
In this phase, you will define your raw stock dimensions and establish your Work Coordinate System (WCS). Pay close attention to setting your origin point (X, Y, Z zero) to match your physical fixture on the shop floor. An accurate origin prevents costly offset errors and sets a solid foundation for reliable cutting.
Step 2: Selecting and Optimizing CAM Toolpaths
With your setup complete, you can begin assigning cutting operations tailored to your part's geometry. Fusion offers a wide variety of 2D and 3D strategies:
- Facing: Creates a flat, smooth surface baseline on your raw stock.
- Adaptive Clearing: Uses high-speed roughing techniques to maintain constant tool engagement, significantly reducing cycle time and spindle load.
- 2D/3D Contour & Pocket: Perfect for finishing wall geometry, internal cavities, and fine decorative details.
Fine-tuning parameters like feed rates, spindle speed, stepdown, and stepover distances optimizes material removal while extending tool life. Tailoring these settings directly improves surface finish quality and overall CNC precision machining efficiency.
Step 3: Simulating Toolpaths to Prevent Crashes
One of the greatest advantages of Autodesk Fusion is its built-in simulation engine. Never send raw G-code to your machine without running a digital dry run first.
During simulation, turn on material stock visibility and collision detection. Watch closely to verify that tool holders clear your workholding clamps and that no gouging occurs on finished surfaces. Catching potential errors virtually saves expensive tooling, protects your machine spindle, and guarantees peace of mind.
Final Thoughts
Mastering toolpath creation and digital verification takes the guesswork out of the manufacturing process. By establishing a methodical workflow in Autodesk Fusion—from accurate stock setup to thorough simulation—you will consistently achieve flawless execution in your CNC precision machining projects. Fire up Fusion, start simulating, and turn your digital designs into perfectly machined reality!

No comments:
Post a Comment