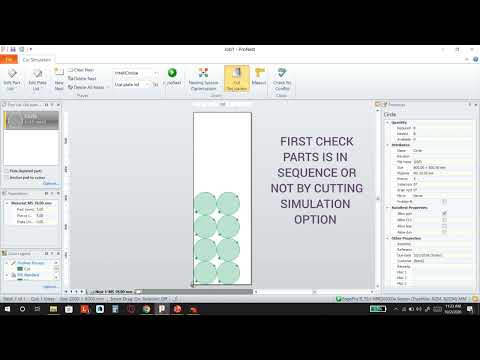
In thermal cutting operations, machine efficiency and job accuracy rely heavily on proper pre-production preparation. When working with advanced CNC nesting software like Hypertherm ProNest, controlling the cut order and identifying parts clearly is critical for a smooth workshop workflow. Setting the correct cutting sequence prevents material warping, minimizes unnecessary torch travel, and keeps your production floor highly organized.
In this quick guide, we will walk you through why cutting sequence numbering matters and how to set it up in ProNest to maximize your shop’s productivity.
Why Cutting Sequence and Part Numbering Matter
Before diving into the software settings, it is essential to understand how sequence management impacts your cutting results:
- Reduces Thermal Distortion: Cutting parts in a strategic order allows heat to dissipate evenly across the plate, preventing thin sheets or intricate profiles from bending.
- Minimizes Machine Travel Time: An optimized sequence ensures the cutting head takes the shortest, most efficient path between cut profiles, reducing total cycle time.
- Streamlines Part Tracking: Sequence numbering displays numerical identifiers on parts, making post-cut sorting, assembly, and quality control far easier for operators.
Mastering these features within your CNC nesting software guarantees that your machinery operates at peak efficiency while reducing costly operator errors.
Step-by-Step: Setting Cutting Sequence Numbering in ProNest
Hypertherm ProNest provides intuitive tools to automate and customize your cut paths. Here is how to set up part sequence numbering:
- Open Your Nesting Layout: Load your parts and generate your nested sheet in ProNest.
- Access the Sequence Tool: Navigate to the main menu and select the Sequence tab. You can choose between Automatic Sequencing or Manual Sequencing depending on your job requirements.
- Define Sequence Rules: Apply pre-set rules (such as Left-to-Right, Bottom-to-Top, or Heat Avoidance) to instantly generate logical lead-in and cutting order sequences across the entire sheet.
- Enable Sequence Numbering: Toggle on the sequence numbering display option to assign clear numbers to each part based on its cut order. You can customize label placement, text size, and visibility.
- Simulate and Verify: Run the built-in cut simulation tool to preview the torch movement step-by-step and make manual adjustments if necessary.
Final Thoughts
Properly configuring part sequences and numbering is a fundamental skill for any CAD/CAM programmer or CNC operator. Taking advantage of the sequencing features inside modern CNC nesting software saves time, protects raw materials, and ensures flawless post-processing. Try optimizing your sequence settings on your next cutting job to experience cleaner cuts and faster throughput!

No comments:
Post a Comment