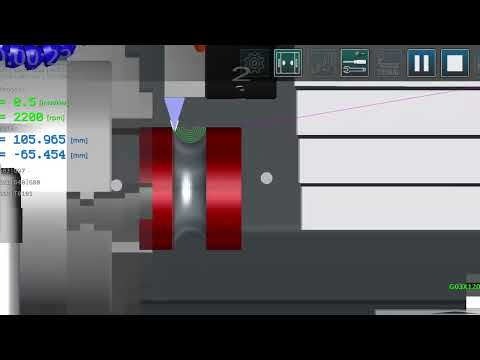
In the world of precision engineering, moving from a conceptual design to a finished industrial part requires more than just a machine; it requires a deep understanding of software, geometry, and simulation. If you have ever wondered how a pulley is crafted with millimeter-perfect accuracy, the secret lies in mastering CNC toolpath theory. By using a CNC simulator, operators can visualize and refine the entire machining process before a single chip of metal is ever cut in the real world.
Why Start with a CNC Simulator?
Before heading to the workshop, a simulator acts as a vital "digital twin" of the actual machining environment. It allows engineers to test their G-code and M-code without the risk of tool breakage or expensive material waste. For components like pulleys—which involve specific grooves and varying diameters—seeing the operation in a virtual space is a game-changer for both students and professionals.
Applying CNC Toolpath Theory to Pulley Design
The core of any successful machining project is the logic behind tool movement. This is where CNC toolpath theory becomes crucial. For a pulley, the toolpath must be strategically planned to account for the roughing of the outer diameter, the precision cutting of the V-groove, and the final finishing passes.
Understanding this theory involves calculating the optimal feed rates and spindle speeds relative to the tool's geometry. In a simulator, you can observe how the tool approaches the workpiece, ensuring that the transitions between different diameters are smooth and efficient. Mastering CNC toolpath theory ensures that the tool spends the maximum amount of time cutting and the minimum amount of time in "air moves," leading to a highly optimized production cycle.
The Step-by-Step Pulley Machining Process
- Setting the Workpiece: Define the raw material dimensions (the billet) within the simulator.
- Tool Selection: Choose the correct turning and grooving tools based on the specific pulley profile required.
- Programming the Path: Input the coordinates. By following established principles of machining, you ensure the tool follows the most efficient route.
- Simulation Run: Execute the code to watch the pulley take shape. This is the time to check for any potential tool collisions or dimensional errors.
Conclusion
Mastering pulley production in a CNC simulator is the perfect way to bridge the gap between classroom learning and shop-floor reality. By focusing on the intricacies of tool movement and geometry, you turn complex engineering challenges into repeatable, high-quality results. Whether you are a hobbyist or a professional machinist, the journey to perfection starts with a solid grasp of simulation and theory.

No comments:
Post a Comment